|
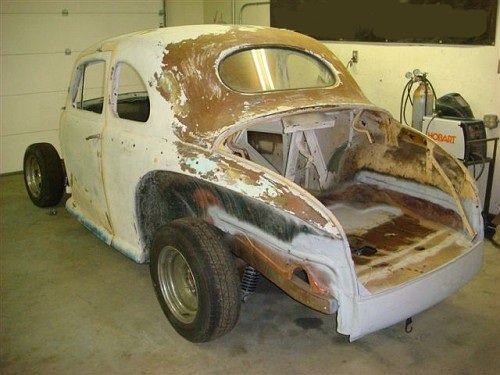
How to Chop A Top (Page 1)-Want to chop a top? While every type of car is different, the lessons here can be used on any car, from technical points, things to look for, and things to take into consideration. (Pay special attention to the way they handle the rear window.) -Trent- Chopping a 1947 Ford Club Coupe by Pete Sanchez aka 49Flatty Pot O Gold Kustoms Colorado Springs, CO 719-358-6981 Builders: Shannon Waltz and Pete Sanchez
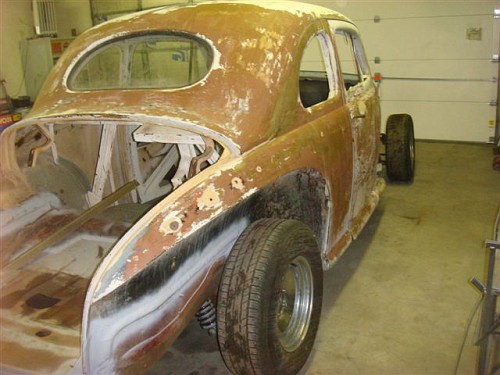
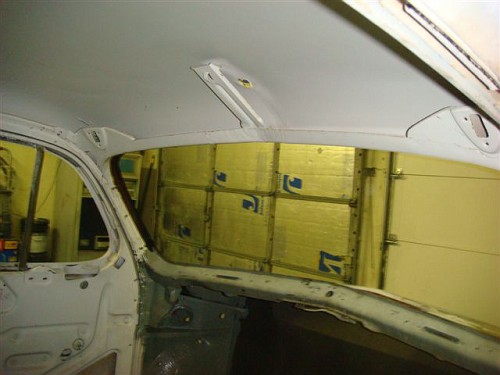
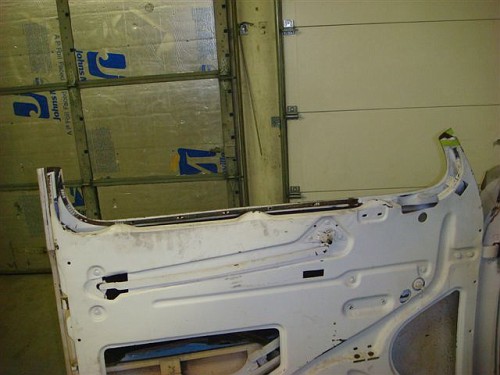
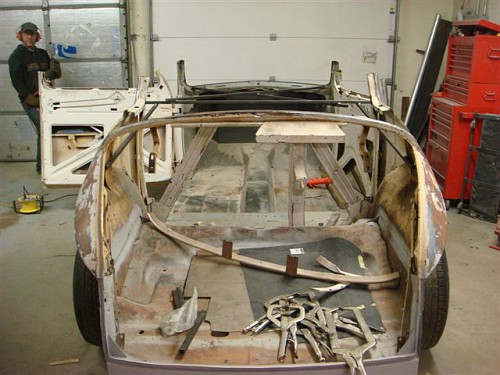
Choptvan and I have combined efforts to finish a 1947 Ford Club Coupe (long door) that I have been working on and off for 10 years now. I have always envisioned this car being chopped but never thought I would do it. Everything I read in how-to books stated these turret top fords were almost impossible to get the chop done right. The turret top was just never my style but I feared in taking the first step. I also really hated the look of the small porthole quarter window some of them turn out having after being chopped. The effort you see here was put forth to showcase some of Shannon’s (Choptvan) work and abilities. There is a lot of work being planned on this build and a separate build thread will be started. I decided to keep track of the work performed to show others that doing a chop on this kind of vehicle really is do-able and not out the reach of those reading these pages. Before attempting any cutting, bracing or measuring, you should make sure the rest of the body is in good enough shape to be chopped. The roof is a major structural point of the vehicle, once the roof is off; the rest of the body will just fold outwardly if not held together properly. Make sure the doors line up properly before starting or they might just be worse when you finish. With that said, Let’s get this chop started by showing the subject in its formal self:
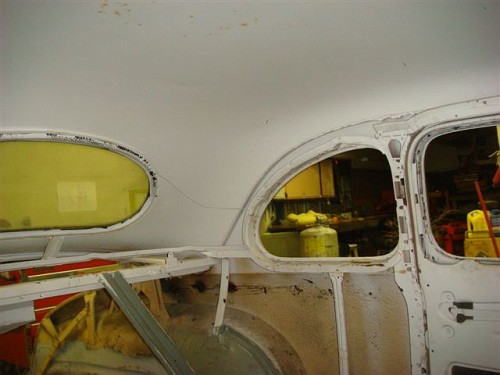
The inside shows where someone had cleaned off the inside and covered it in white paint
We started by sanding the outside of the vehicle of all paint and any surface rust for better tacking.
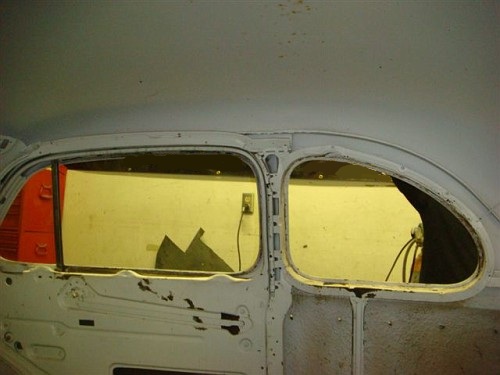
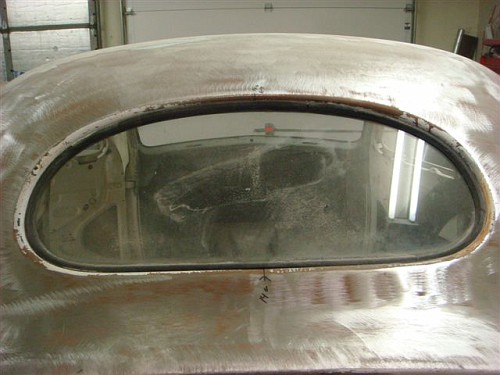
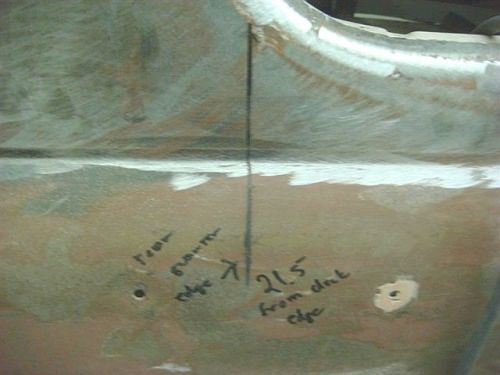
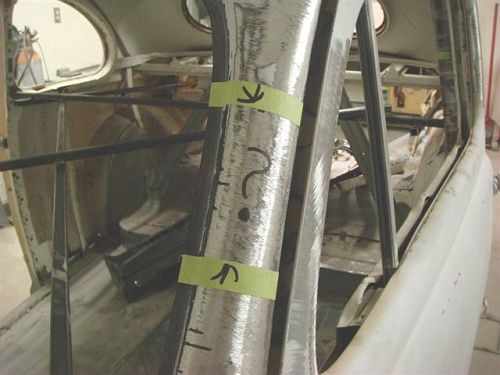
Take measurements in different areas and mark them with permanent marker for later reference. Here is a couple of measurements that we recorded. Rear window 14" at the tallest point
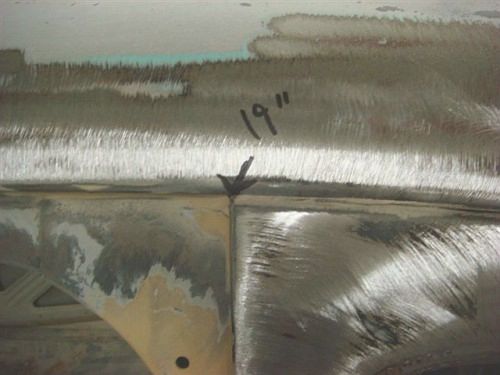
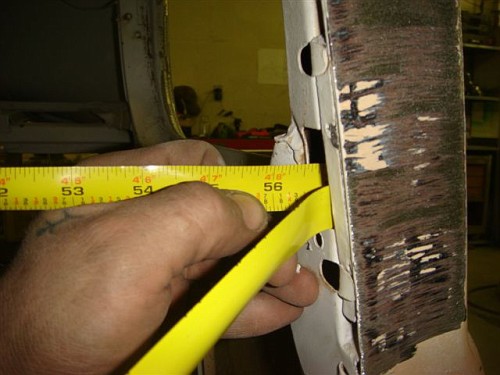
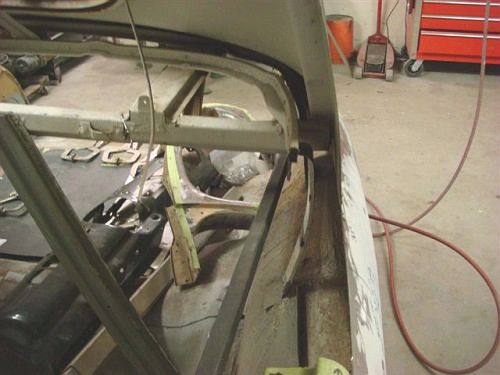
The measurement between the body-line to top bottom of the rain gutter is 19" (Someone removed the rain gutter on this one before we got our hands on it)
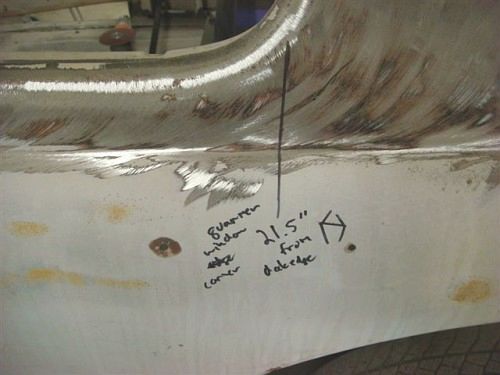
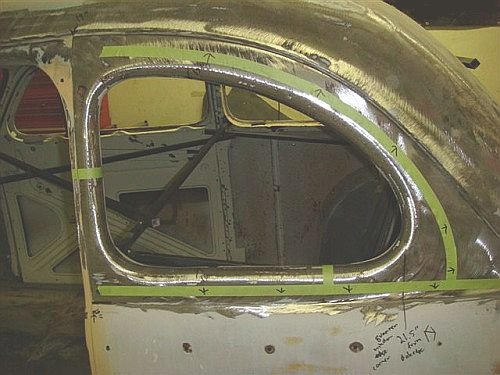
Edge of Quarter Window to edge of deck lid opening 21.5"
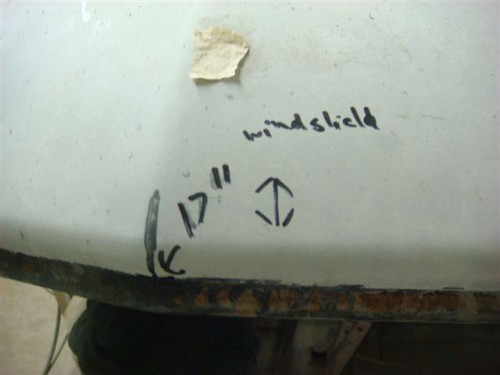
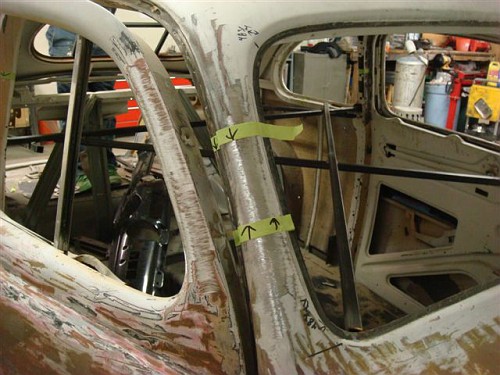
The following measuring points are very important in order to maintain an even windshield opening. Create an "X" inside the windshield opening. Make a mark of where you are measuring from and to. Remember to not bend the tape measure in any way or it will give you and erroneous reading. We measured 48 ¾" corner to corner of window opening edge.
We also measured the height of the windshield opening at 17"
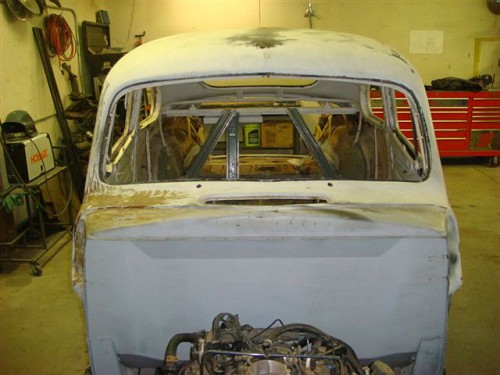
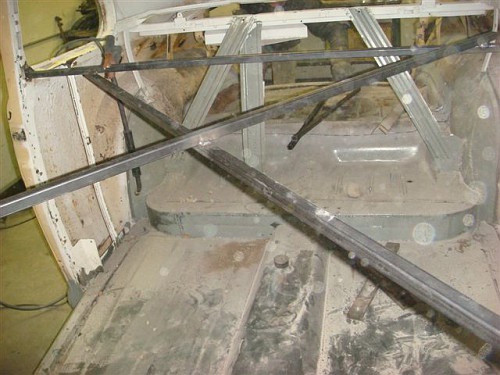
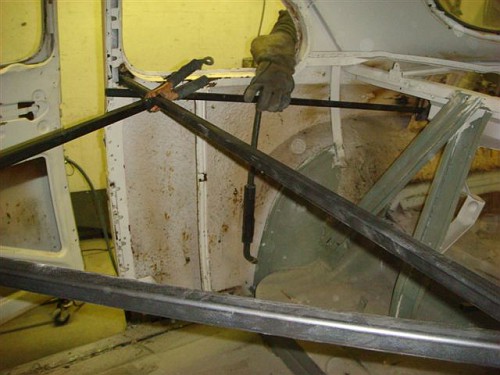
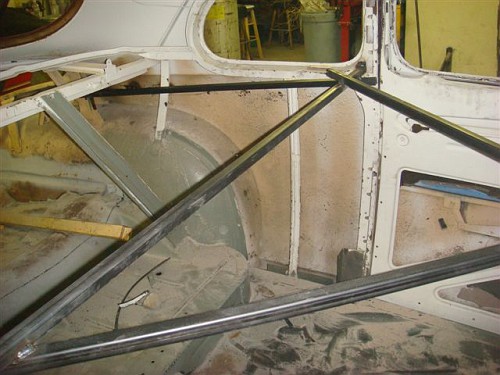
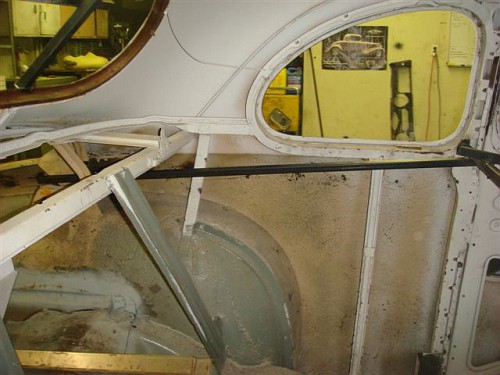
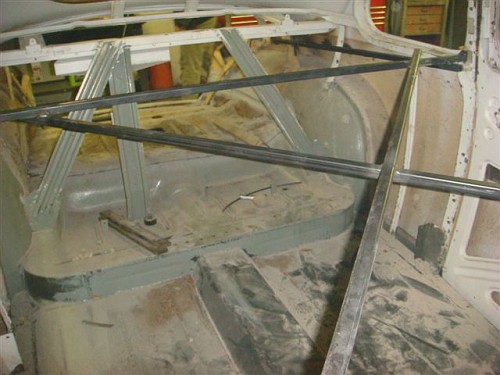
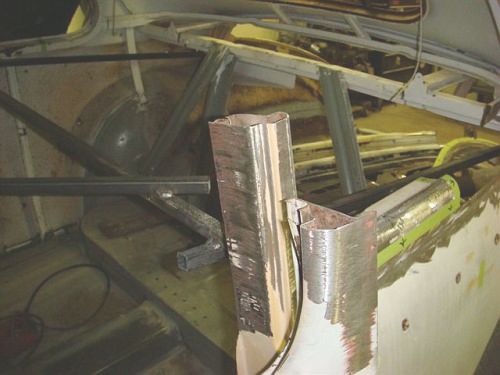
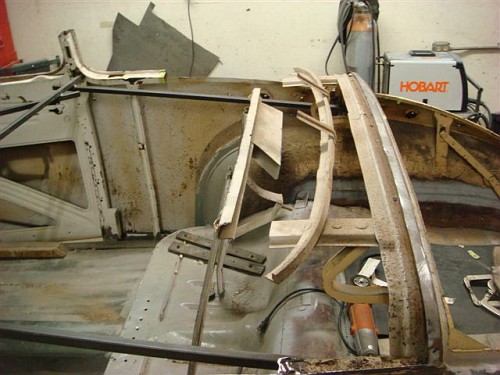
Next, we measured and cut tubing to brace the inside of the body. If you want your chop to come out right, do not skip this crucial step.
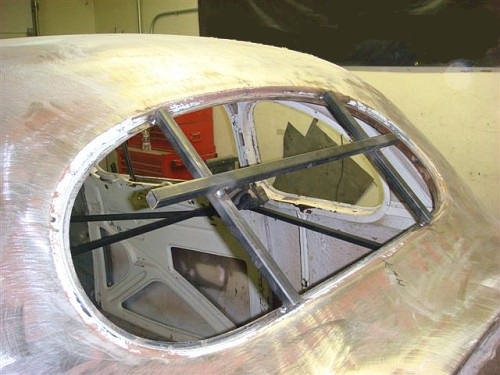
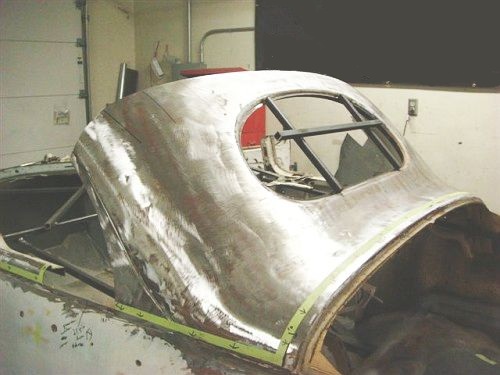
We also pulled out the rear window and added bracing to it to keep it from flexing and make it stay in the same shape. Note: We installed the bracing on the outside but in hindsight, installing the bracing on the inside of the window frame would have made future steps a little easier.
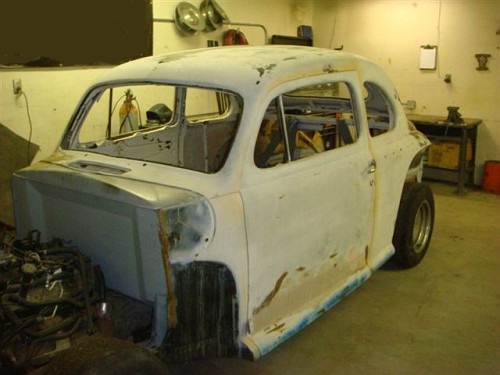
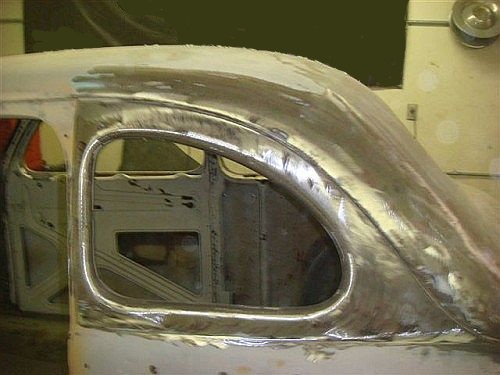
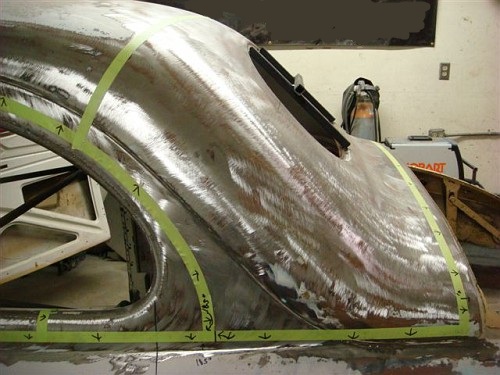
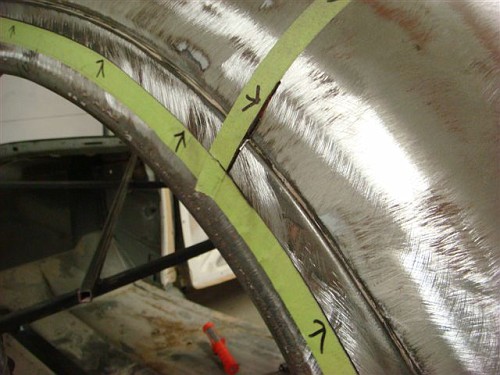
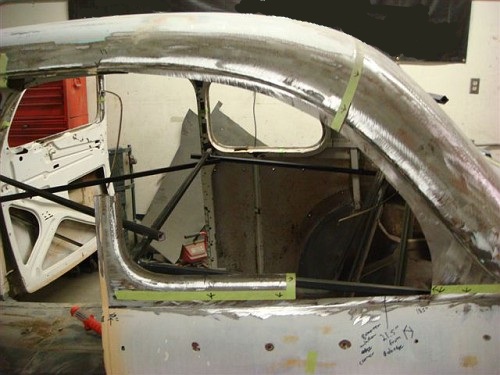
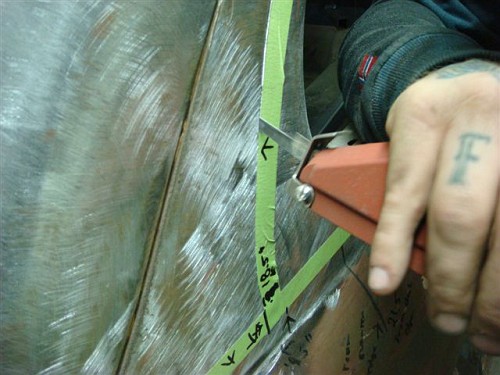
Next comes laying out the cut lines with tape. Since we wanted to make sure we still had quarter windows when we finished the chop, we decided to best thing to do was to cut the windows out completely first and then reinstall it later to our liking. The arrows on the tape show which line of the tape to cut. Believe or not, that small step can make a huge difference when you are in the middle of making cuts.
We did not write how much we cut off the A pillars because to be honest, we had no idea how much we were going to cut off. Remember arrows point to which line to cut.
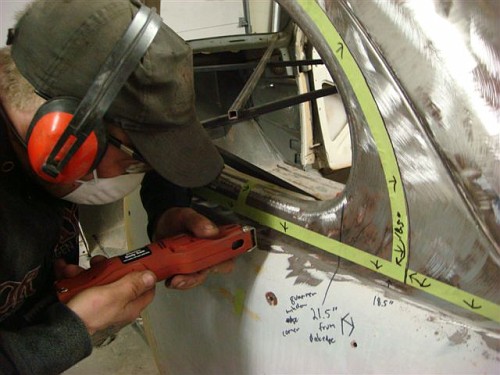
We used a couple of different tools to perform the following cuts. The ever popular and reliable Sawzall, an electric saw with a small metal blade (makes finer cuts and easier to control), a electric grinder with a cut off wheel attached to it. Next, let the cutting begin. We started with the quarter windows. Here you can see the process in action. The first picture shows where the electric grinder with cut off wheel was used to start the cuts and then the electric saw used to continue. The saw makes real fine line cuts which will be needed at a late time.
There is a lot of metal formed together at the top of the B Pillar. We cut straight through it and kept the curvature of the door opening with the quarter windows.
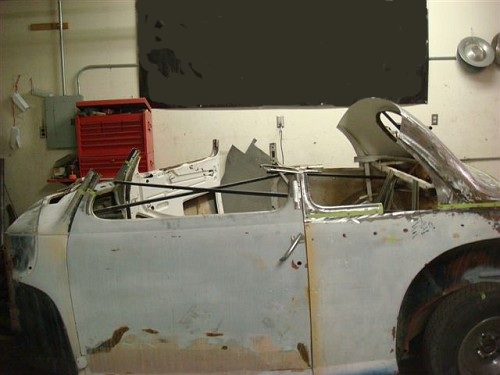
Once the quarters are out and you stop to look at what you have done while at the same time you wait for your heart rate to come down, go ahead of lop off the top of the doors.
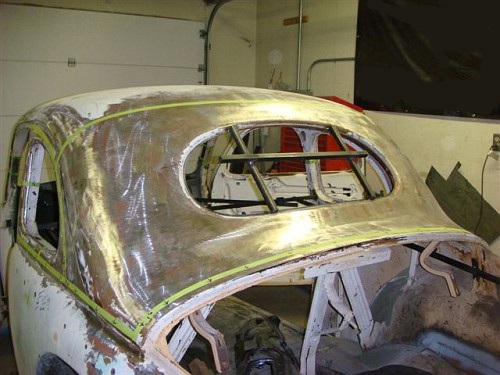
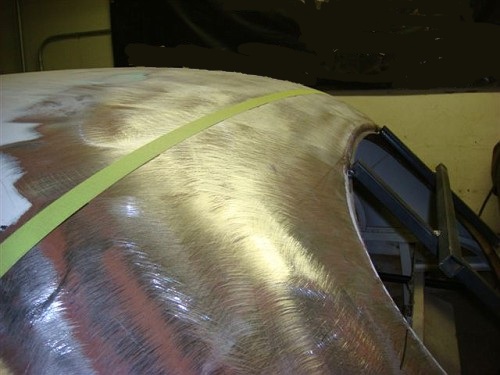
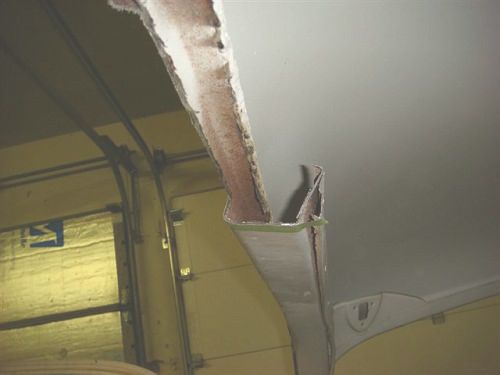
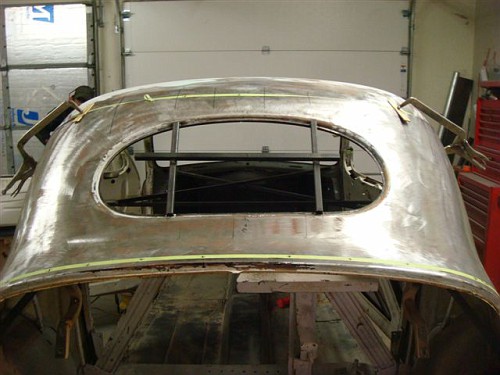
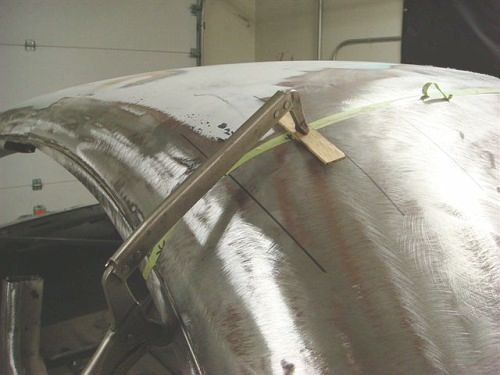
The next cut will be the back of the roof. I must note that before you make this cut, draw several vertical lines that you can use for reference at a later time. I added them after we started cutting it, but it worked ok. After the cuts are done, the roof will be real floppy. We used some clamps to hold it while we cut the A pillars. The Sawzall came in handy when cutting the A pillars as there is a lot of metal to go through.
This is where you end up after the last step:
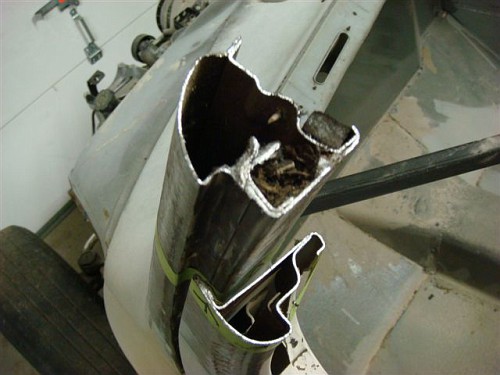
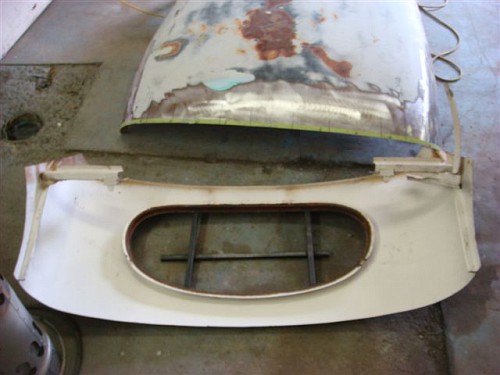
The next cut is a very tedious one and you will use the small electric saw for this one. We decided to cut it here to give us the best transition from deck lid to back window. There are two pieces of metal with very little room in between. The saw can only be inserted about ½" before the tip of it hits the next piece. Go slow and easy and you will get good results.
Here is the roof in two pieces.
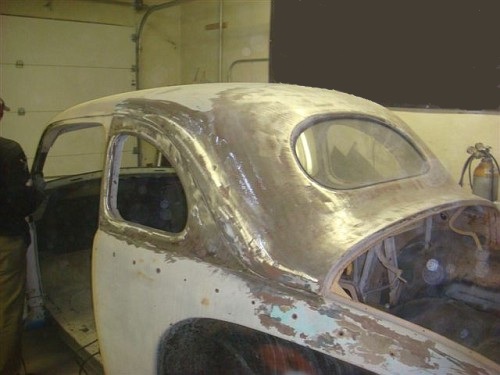
Take a break, take a look at what you have accomplished and start thinking about how it is all going to go back together.
Return from Chop A Top page 1 to Bodywork
|